You just got your very own Satisfactory server and are ready to get started! But before you can start playing, you will need to set this up so that you and other players can join.
This guide will show you the steps to configure your new Satisfactory server for the very first time.
1. Log in to your game panel.
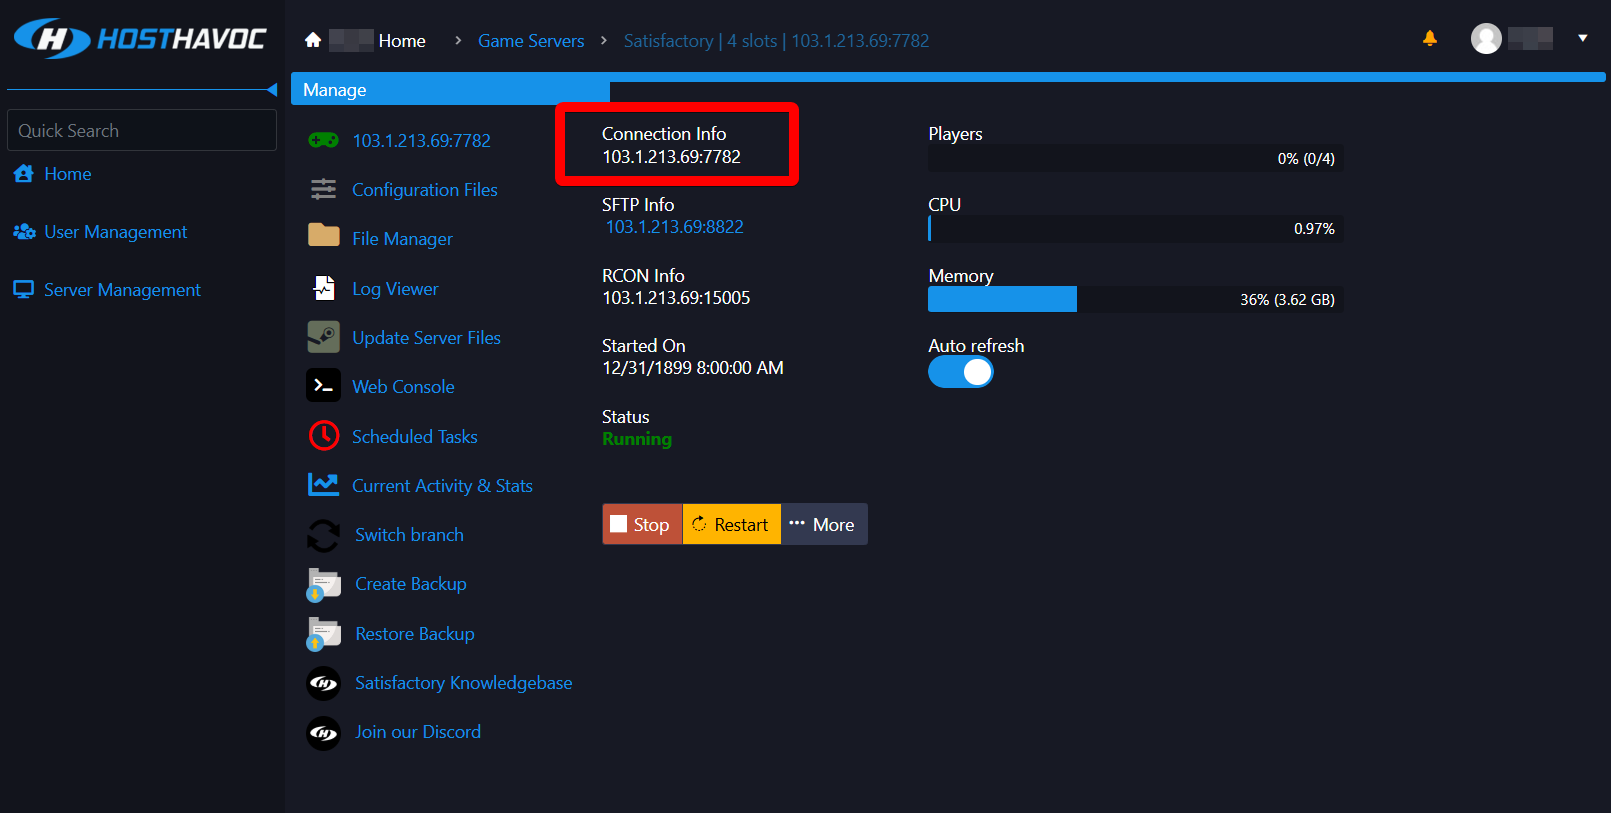
2. On your Satisfactory server's dashboard, copy the Connection Info and make sure your server status is Running
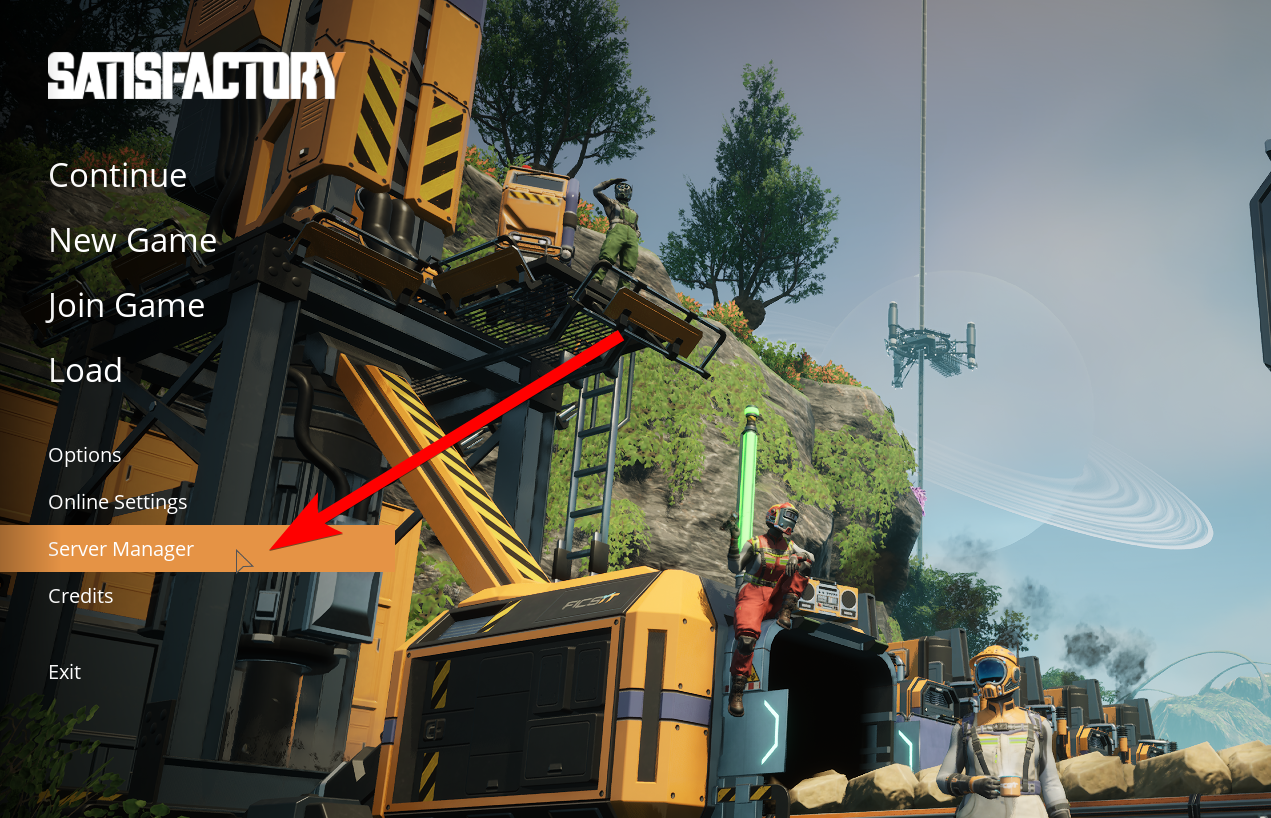
3. Launch Satisfactory on your computer and click on Server Manager.
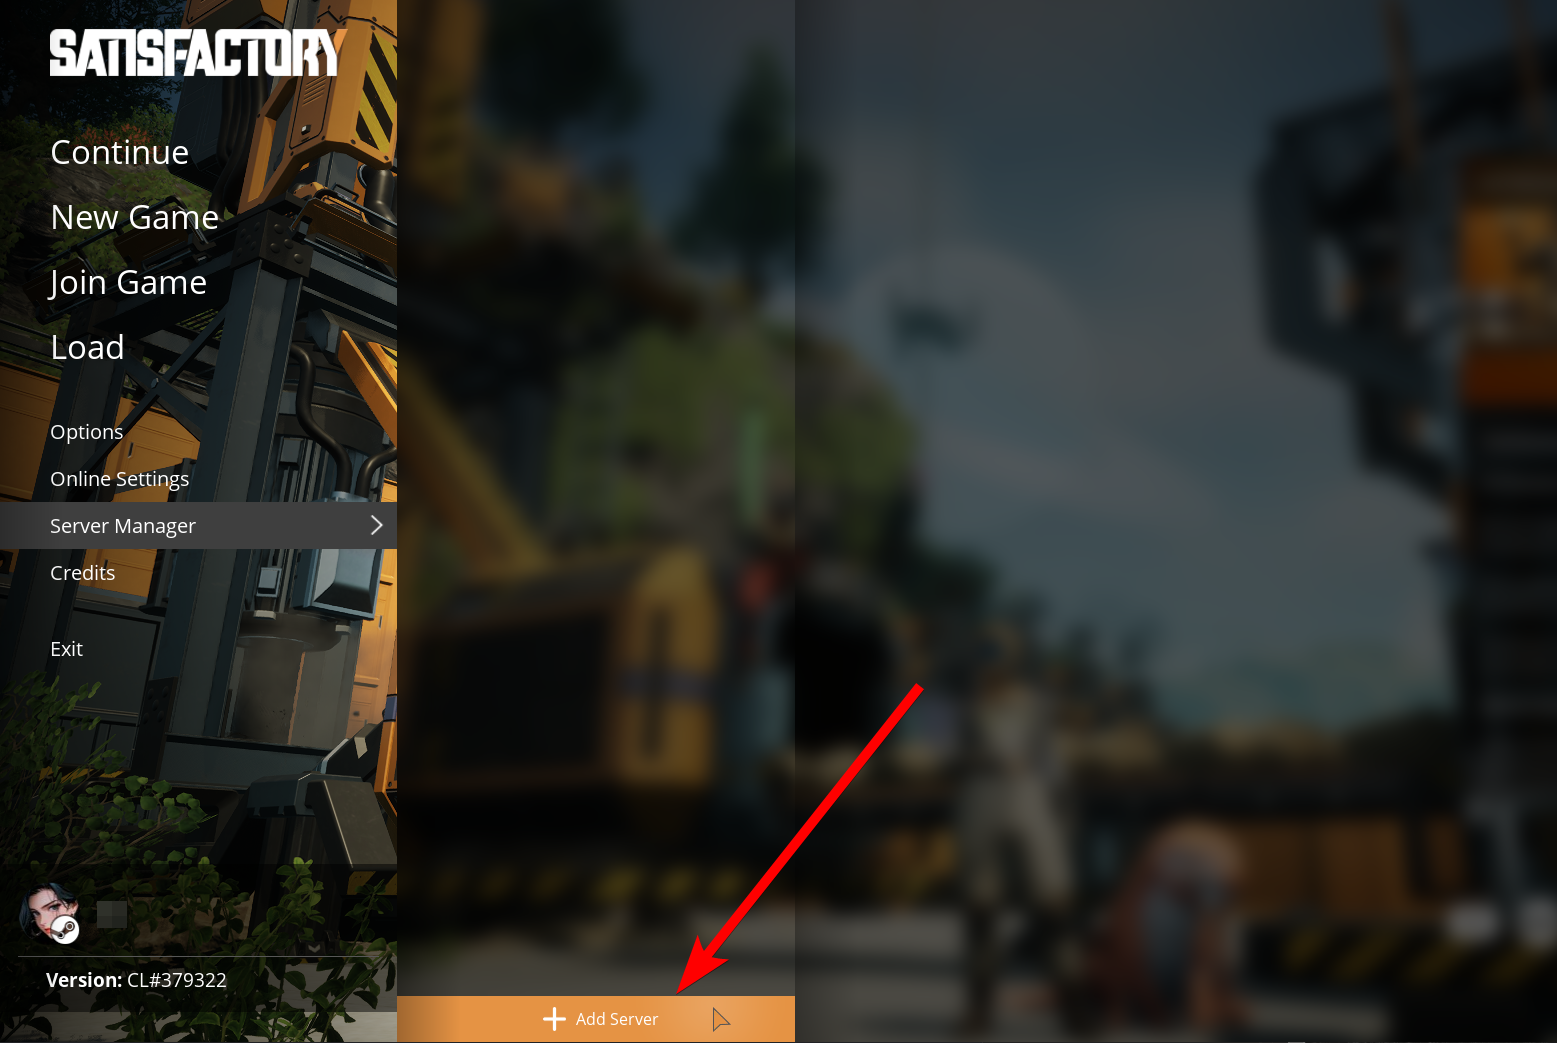
4. Click Add Server.
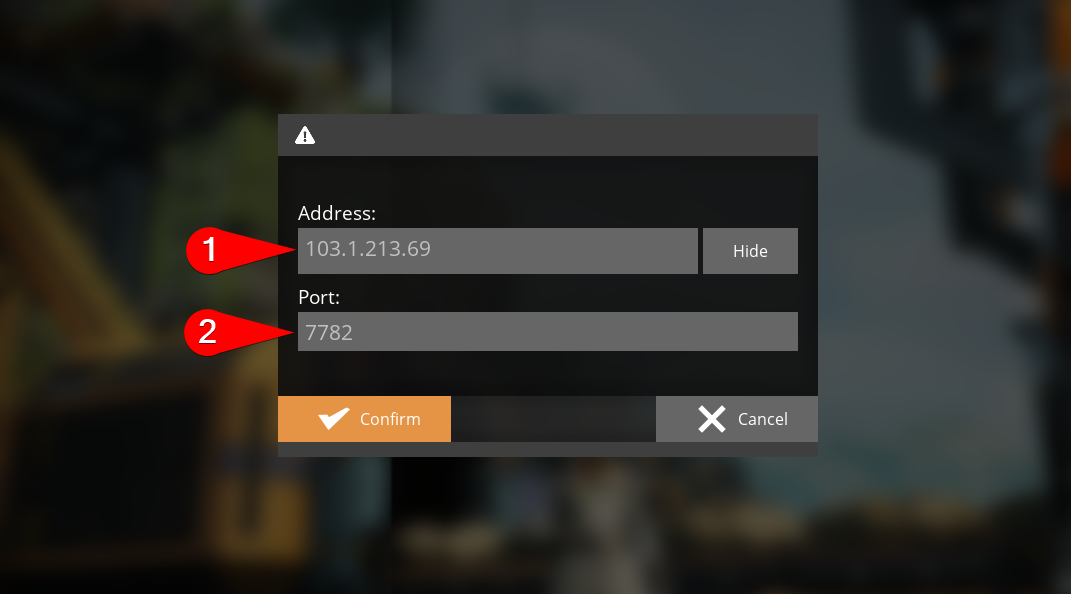
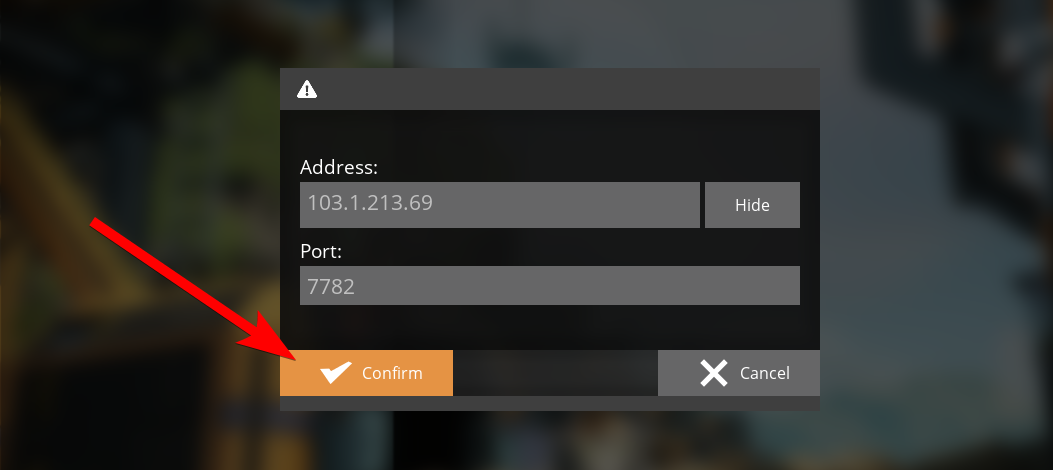
5. Enter the Connection Info you copied in Step 2.
As an example, if your Connection Info is
6. Click Confirm to save the details.
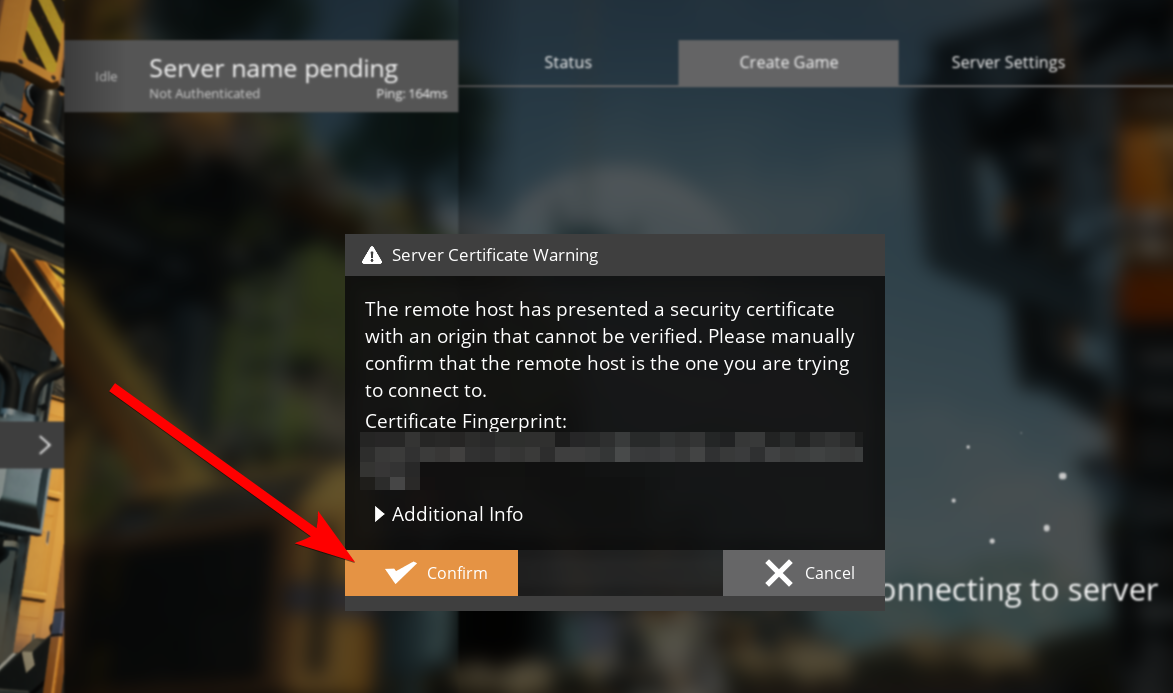
You may see a Server Certificate Warning popup window which you can just click Confirm.
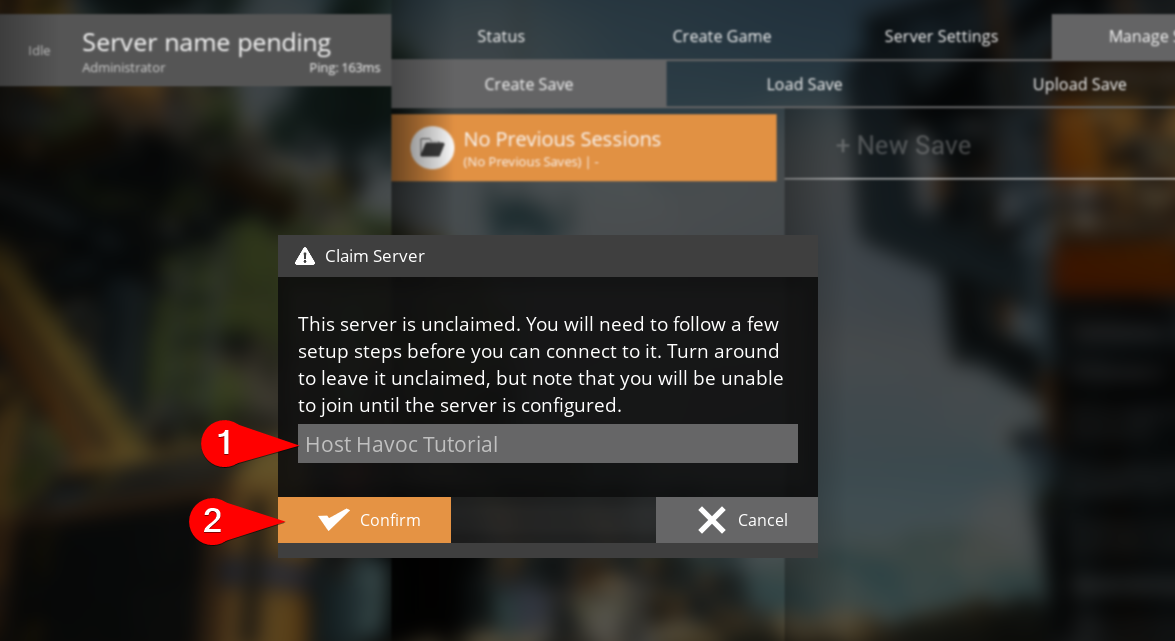
7. Another popup will appear where you will be asked to enter a name for your server. Fill this out and click Confirm.
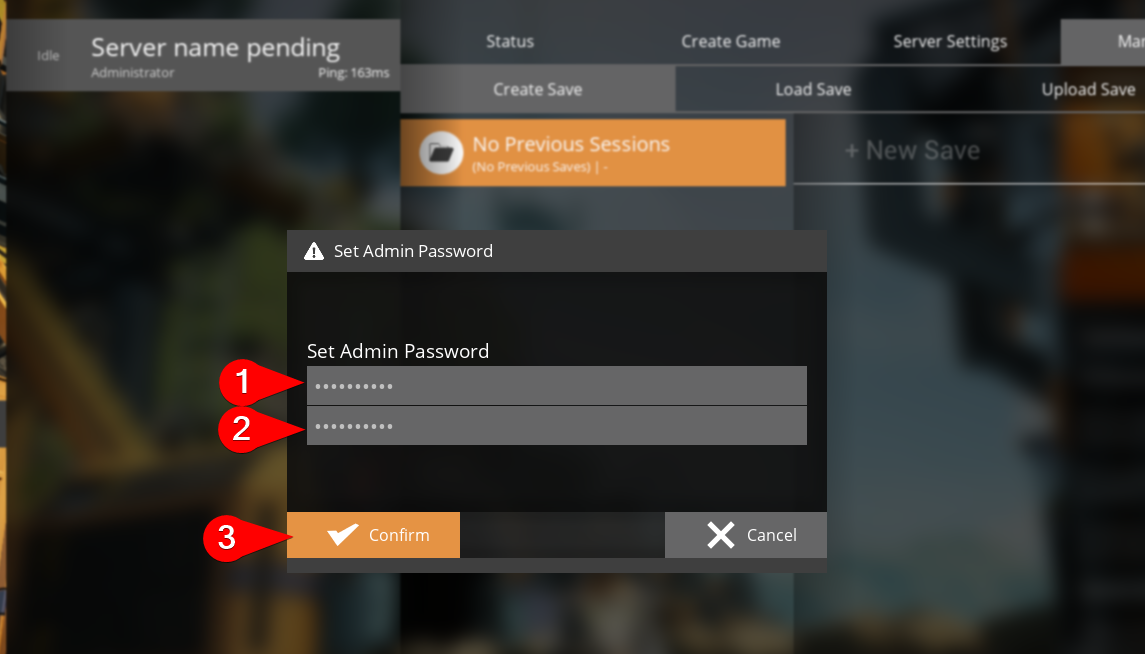
8. You will then be asked to set an Admin Password. Fill this out once again and click Confirm.
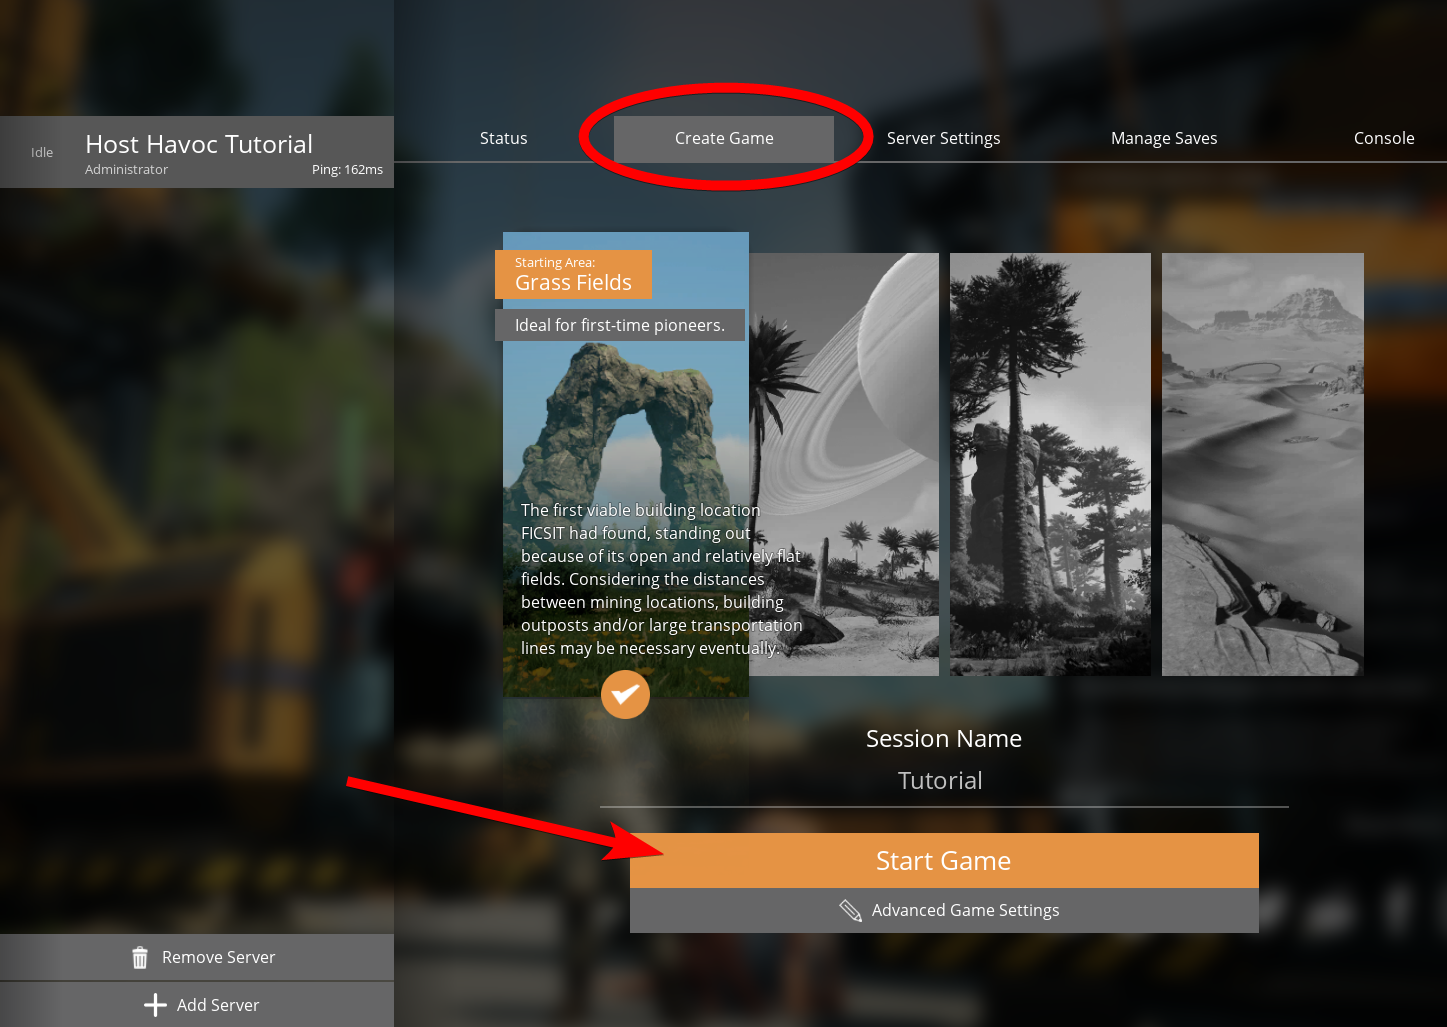
9. Click on the Create Game tab. Select the Starting Area for new players, enter a Session Name, and click Start Game.
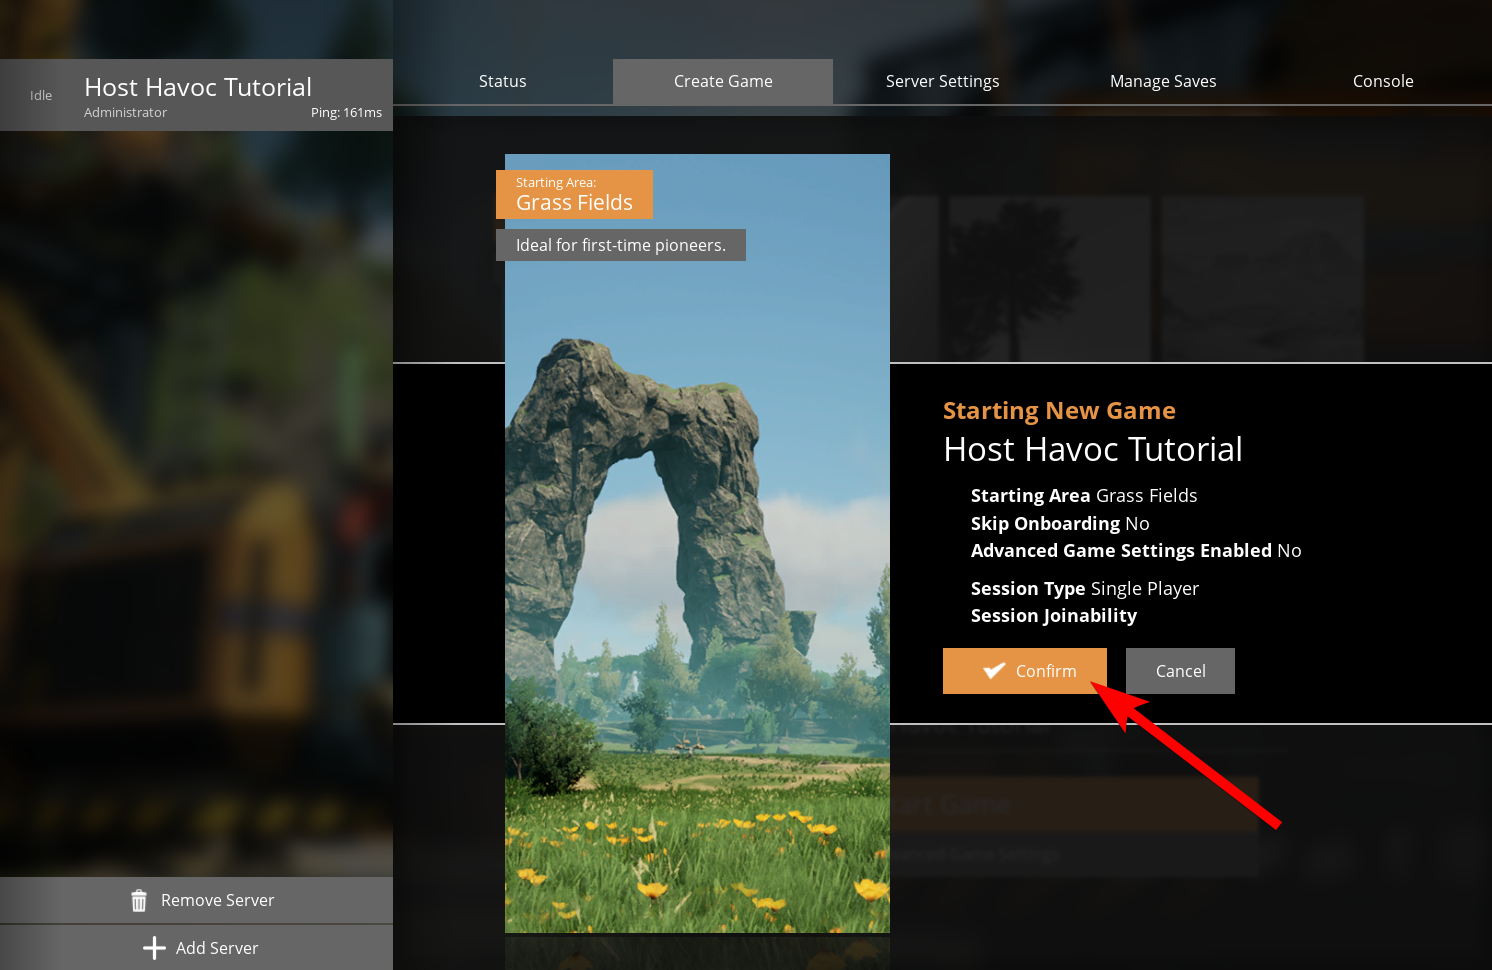
10. A confirmation screen will display your server configuration. Once you've ensured that everything is correct, click Confirm.
This will then begin to create a session on your server which can take a few minutes.
That's it! Your server is now ready for you and your friends to play in your very own Satisfactory server by Host Havoc!
If you need further assistance, please submit a support ticket and our team will be happy to assist you.
This guide will show you the steps to configure your new Satisfactory server for the very first time.
1. Log in to your game panel.
2. On your Satisfactory server's dashboard, copy the Connection Info and make sure your server status is Running

3. Launch Satisfactory on your computer and click on Server Manager.

4. Click Add Server.

5. Enter the Connection Info you copied in Step 2.
As an example, if your Connection Info is
103.1.213.69:7782, the Address would be 103.1.213.69 and the Port would be 7782. 
6. Click Confirm to save the details.

You may see a Server Certificate Warning popup window which you can just click Confirm.

7. Another popup will appear where you will be asked to enter a name for your server. Fill this out and click Confirm.

8. You will then be asked to set an Admin Password. Fill this out once again and click Confirm.

9. Click on the Create Game tab. Select the Starting Area for new players, enter a Session Name, and click Start Game.

10. A confirmation screen will display your server configuration. Once you've ensured that everything is correct, click Confirm.

This will then begin to create a session on your server which can take a few minutes.
That's it! Your server is now ready for you and your friends to play in your very own Satisfactory server by Host Havoc!
If you need further assistance, please submit a support ticket and our team will be happy to assist you.

