Fabric is a Minecraft mod loader and server type similar to NeoForge and Forge which allows you to load Fabric mods on your Minecraft server.
This guide will show the steps of installing Fabric on your Host Havoc Minecraft server.
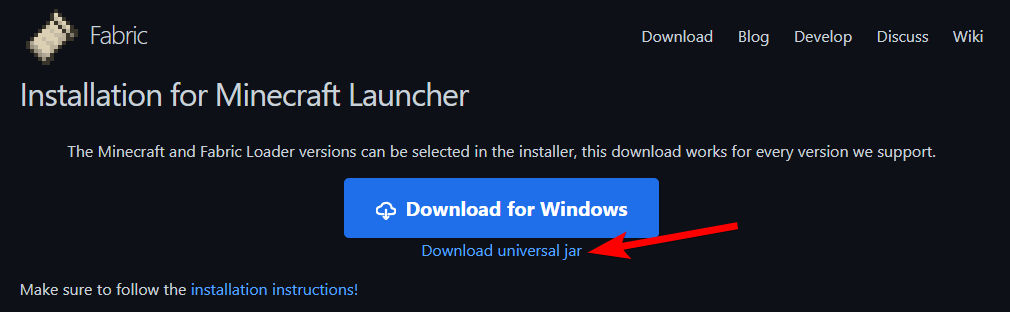
1. Visit the Fabric download page and click Download universal jar.
2. Run the installer JAR file and select the Server tab.
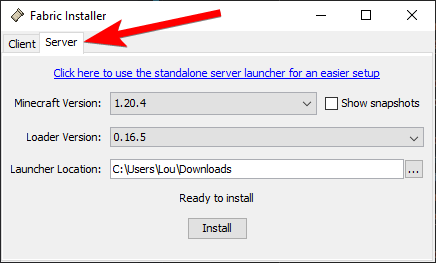
3. Change the Minecraft Version and Loader Version depending on what you want to use. And change the Launcher Location to a folder on your computer where the files will be installed, then click Install.
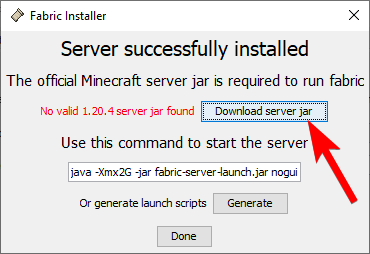
4. A window with the message "Server successfully installed" will appear. Click the Download server jar button.
5. Once the installation and download are finished, click Done and close out of the Fabric Installer.
6. Go to the installation folder and rename the fabric-server-launch.jar file based on the version you are using as specified below:

7. Access your server directory through an FTP client of your choice. (How to setup an FTP client)
8. Upload the all of the Fabric server files (custom-java-xx.jar, libraries folder, server.jar) to the root directory of your Minecraft server.
9. In the Minecraft control panel, look for the JAR File option and select the option that applies to your Fabric version.

10. Click Save then start your server to apply the changes.
If you need further assistance, please submit a support ticket and our team will be happy to assist you.
This guide will show the steps of installing Fabric on your Host Havoc Minecraft server.
Server Installation: Fabric
1. Visit the Fabric download page and click Download universal jar.
2. Run the installer JAR file and select the Server tab.
3. Change the Minecraft Version and Loader Version depending on what you want to use. And change the Launcher Location to a folder on your computer where the files will be installed, then click Install.
4. A window with the message "Server successfully installed" will appear. Click the Download server jar button.
5. Once the installation and download are finished, click Done and close out of the Fabric Installer.
6. Go to the installation folder and rename the fabric-server-launch.jar file based on the version you are using as specified below:
- If you are running Minecraft 1.0 - 1.11.2, rename it to
custom-1112below.jar - If you are running Minecraft 1.12 - 1.16.5, rename it to
custom.jar - If you are running Minecraft 1.17.X, rename it to
custom-java-16.jar - If you are running Minecraft 1.18 - 1.20.4, rename it to
custom-java-17.jar - If you are running Minecraft 1.20.5+, rename it to
custom-java-21.jar
7. Access your server directory through an FTP client of your choice. (How to setup an FTP client)
8. Upload the all of the Fabric server files (custom-java-xx.jar, libraries folder, server.jar) to the root directory of your Minecraft server.
9. In the Minecraft control panel, look for the JAR File option and select the option that applies to your Fabric version.
10. Click Save then start your server to apply the changes.
If you need further assistance, please submit a support ticket and our team will be happy to assist you.
