Method one:
Open your game panel and click on the "Steam Workshop" icon in your panel and search for the mods you'd like to use by name or modID and click install.
This method will automatically add the modIDs to your configuration file.
This method can also be used to add a collection of mods.
Method two:
Step 1: Click on the "Configuration Files" icon and locate your "servertest.ini" config file then open it with "Config Editor".
Step 2: Once the "Config Editor" is opened locate the "Mods" section.
Step 3: Next you will need to find the mods you want to add to your server from the workshop area on your Steam client or web browser.
Step 4: Once you find the mod you want to add you will need to find the section on the mod page that looks like this:

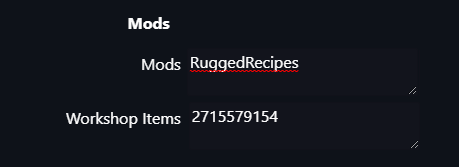
Step 5: You will then copy the "Workshop ID" into the "Workshop Items" section and copy the "Mod ID" into the "Mods" section of the "Config Editor".
Example:

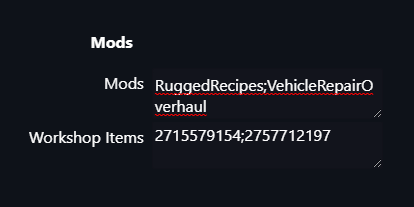
To add multiple mods you will separate each mod with a semicolon (;) like this:

Step 6: Once done adding all of your mods click "Save & Exit" and you can start or restart your server.
If you start the server after using "Method one" and the mods are not working please do the following
Click on the "Configuration Files" icon and open your "servertest.ini" config file with "Text Editor".
Once there search and look for "WorkshopItems="
![]()
Once found find the section in the description that looks like this "Example: WorkshopItems=514427485;513111049"
![]()
When you have found that delete that part and only that part "WorkshopItems=514427485;513111049"
After that portion is deleted "Save & Exit" then click on the "Steam Workshop (installed)" icon and reinstall all mods.
Once all mods are reinstalled go ahead and start your server.

